STEP 1:
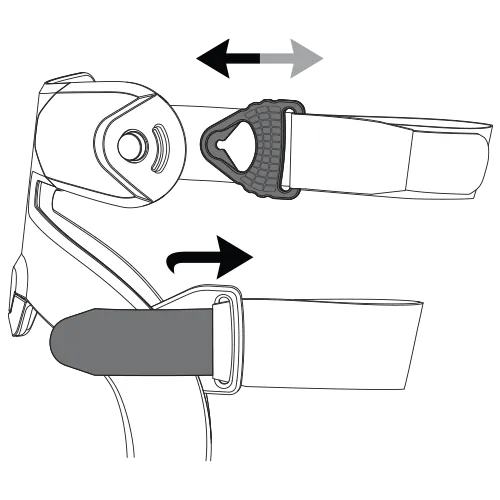
Unfasten straps 2 and 1 by releasing the Strap Ends on the lateral/outer side of the brace and pulling the Strap Ends through the Strap Loops. Pull straps 3 and 4 using the Quick-Loc fastener.
STEP 2:

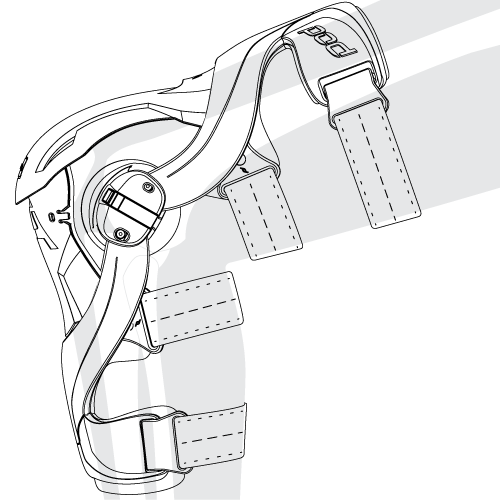
With your knee bent at a 90° angle, place the brace over the knee so that the hinge is located against the side of the knee joint.
STEP 3:

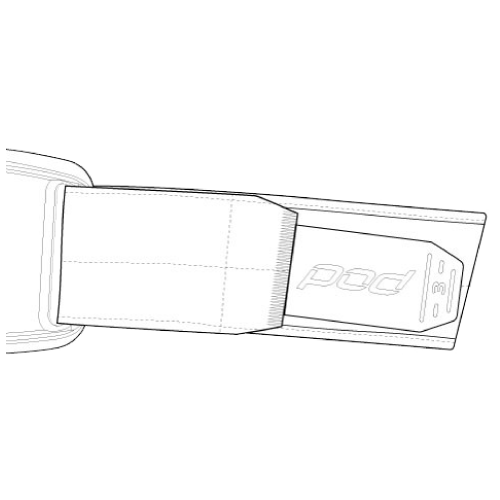
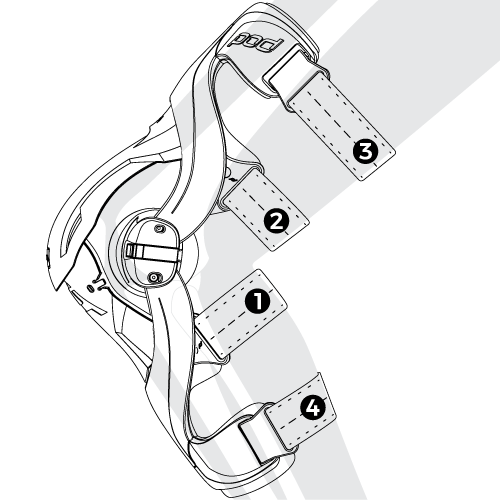
Fit the Lower Strap #1 (directly below the knee) first, as this strap is located above the calf muscle and aids in the correct position of the brace. Pass the Strap End through the Strap Loops ensuring the strap is flat against your leg, tighten until snug and comfortable, and then fasten the Strap End.
Repeat for the Upper Strap #2 (directly above the knee), Top Strap #3 and the Bottom Strap #4.
FINAL:

When positioned correctly, the hinges will be centered on the knee and your leg will move freely. Re-apply the brace if this is not the case.
REMOVAL:
Remove the brace by repeating Step 1.
NOTE:
Do not over tighten or cross the straps. If you experience any pain or discomfort while fitting or using this brace, you should discontinue use immediately and consult your healthcare provider. If the brace causes discomfort on application or during use, repeat steps 3 to 4 to refit the brace with adjusted strap tension/placement.
STEP 1:
Unfasten all straps by releasing the Strap Ends on the lateral/outer side of the brace, and pulling the Strap Ends through the Strap Loops.
STEP 2:
With your knee bent at a 90° angle, place the brace over the knee so that the hinge is located against the side of the knee joint.
STEP 3:
Fit the Lower Strap #1 (directly below the knee) first, as this strap is located above the calf muscle and aids in the correct position of the brace. Pass the Strap End through the Strap Loops ensuring the strap is flat against your leg, tighten until snug and comfortable, and then fasten the Strap End.
Repeat for the Upper Strap #2 (directly above the knee), Top Strap #3 and the Bottom Strap #4.
FINAL:

When positioned correctly, the hinges will be centered on the knee and your leg will move freely. Re-apply the brace if this is not the case.
REMOVAL:
Remove the brace by repeating Step 1.
NOTE:
Do not over tighten or cross the straps. If you experience any pain or discomfort while fitting or using this brace, you should discontinue use immediately and consult your healthcare provider. If the brace causes discomfort on application or during use, repeat steps 3 to 4 to refit the brace with adjusted strap tension/placement.